I followed a tutorial on Honestly WTF here, which is very clear and by the way, please check her other DIY because they are GREAT! I will try some of her projects later on!
You can do a lot of different kind of friendship bracelet, but I went for the 'chevron' pattern, because I like it the most. For doing your friendship bracelet, you will need:
- embroidery thread (colors of your choice). If you buy 4 different colors, it makes a pretty nice bracelet.
- scotch tape or safety pin (I used scotch tape and it worked perfectly)
- scissors
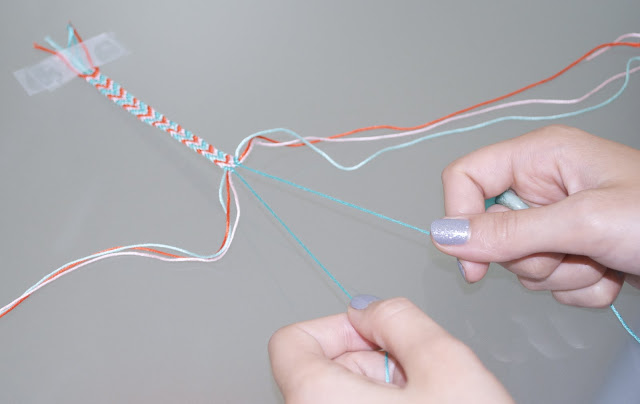
Step 1: cut your embroidery thread in pieces of 65cm (around, it will depend on your wrist seize) and scotch tape the pieces together. You will need to cut 2 pieces of each color and put them in symmetric shape just like this:
Step2: Starting from the left side, take the embroidery thread, which is at the exterior. Here, the red one.
You need to put it on the top of the next embroidery thread (which is here the pink one). You can check the move on the picture below:
(As explained above, take the most exterior embroidery thread and put it on the TOP of the next one, always on the TOP).
Step3: After that, put the exterior embroidery thread under the embroidery thread you just 'passed over', just like this:
Step4: Then pull the embroidery thread you just put under the other one. You will obtain a 'knot', just like this:
Step5: You need to repeat the previous steps and make a second knot. For every moves you make, repeat it two times! After you passed on the top and then under one embroidery thread, repeat the same move for the next embroidery thread. When you reach the last one of one side, just leave that side and go on the right exterior. On the right exterior, start repeating going on the top of the next embroidery thread, and under. When you reach both sides to the middle, you will get this:
Step6: Take the two embroidery thread of same color and cross them to make a knot. Do it two times!
Step7: Go back to the left exterior, and do all of the steps again! When you think you are done with the 'chevron' pattern, you can finish by a fishtail or a normal braid:
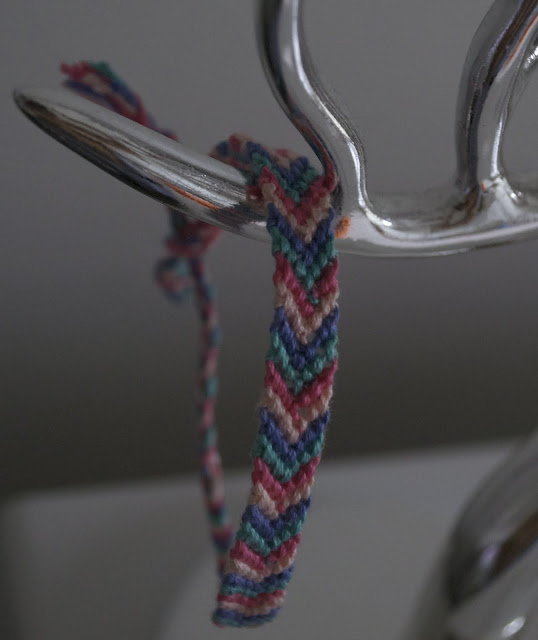
Here is the results of my friendship bracelet. The one just above will go to Avec Sofie, one of my bestfriend! I think she picked really good colors, I really like how the bracelet ended up!
What do you think? Isn't it good idea for Summer and to keep yourself busy during the rainy days in Helsinki?
Nixon Watch
Urban Outfitters Ring
I will now focused on other kind of bracelets and other DIY. Talk to you soon!
Fr: Nous avons eu une journée pluvieuse ici a Helsinki et j'ai donc décidé d'occuper mon temps libre a faire des 'friendship' bracelets. Vous pouvez suivre le tutorial que j'explique ici, mais une video Youtube ca peut paraitre plus simple! J'ai fait des bracelets comme ceux la quand étais plus petite mais j'ai maintenant oublie comment on faisait. C'est pourquoi j'ai pensé qu'un petit tutorial pourrait vous aider aussi si vous étiez dans la même situation que moi!
Etape1: Coupez environ 65cm de votre fil. Pour le bracelet que je fais sur les photos, il faut compter 4 couleurs différentes de fil. Coupez deux fois la même couleur et scotchez les couleurs de manière symétrique.
Etape2: Prenez le fil le plus a l'extérieur a gauche, et passez le au dessus du fil suivant. Passez le fil toujours AU DESSUS du suivant.
Etape3. Apres avoir passé le fil au dessus du suivant, passez le en dessous.
Etape4. Tirez le fil que vous avez passé en dessous et faites un noeud qui va rejoindre la base de votre bracelet. Pour chaque couleur de fil, faites toujours deux noeuds.
Etape 5. Continuez le même processus pour les fils suivants. Une fois que vous avez fini un cote, laissez le fil qui était le plus a l'extérieur et qui devrait maintenant se trouver a l'intérieur. Allez a l'extrémité de droite et répétez les étapes précédentes jusqu'à ce que vous arriviez au milieu avec les deux fils de la même couleur.
Etape6. Croisez les deux fils de la même couleur de manière a faire un noeud. Et faites en un deuxième après de la même manière.
Etape7. Apres cela, vous pouvez retourner a l'extrémité de gauche, et répétez les étapes précédentes. La longueur de votre bracelet dépendra de la taille de votre poignet. J'ai termine mes bracelets avec une 'natte' normale ou alors un natte 'fishtail'.
Qu'en pensez-vous? Je trouve que c'est une très bonne idée pour l'été. Surtout depuis que le 'color block' est trendy!


No comments:
Post a Comment