Monday, August 15, 2011

Outfit for (rainy) day

Hello there, how is August month going for you guys? I know that everyone in Finland was super busy with Flow festival this week end. I heard that you have really good weather and I'm really happy to hear that! It would have been a shame otherwise ... Unfortunately here in France, the weather is NOT good at all. It's pretty much raining all day and I haven't been able to wear a short at all since I arrived! I'm crossing my fingers to see some sun before going back to Finland. Before that, jackets are necessary and darker colors come back! Let me know what you think about this outfit!


Shirt/Dress Zara
Mango Jacket
Shoes for Teddy Shoes
Purse Rue Princesse
Watch Nixon
Ring bought in Vancouver
Nailpolish Green Apple Sephora
Lipstick Sephora


Fr: Bonsoir les amis, comment se passe votre mois d'aout? Je sais qu'en Finlande tout le monde était assez occupé ce weekend a cause du Flow festival. C'est un des meilleurs festival de musique en Finlande (et il a lieu a Helsinki). Ce soir c'est d'ailleurs Kanye West qui est a Helsinki parmi d'autres très bons artistes tels que Röyksopp, Janelle Monae, The Do, Mogwai, Empire of the Sun, etc. (Ps: Rihanna sera a Helsinki le weekend prochain sur la plage, alors si vous etes a Helsinki, allez y faire un tour!) Bref, je disais aussi que mes amis a Helsinki avaient beaucoup de chance puisque le soleil était de la fête, ce qui n'est pas exactement le cas de la France (enfin tout dépend de la region dans laquelle vous vous trouvez en France). Je suis un peu déçue, de ne pas pouvoir profiter d'un peu de soleil en France, mais je ne désespère pas d'en voir un peu avant mon départ! En tous cas, les vestes sont de rigueur, ainsi que les couleurs un peu plus foncées! Dites moi ce que vous en pensez! Bisouuus +

Thursday, August 11, 2011

Travelling = Shopping!

Hi guys, I'm finally in France. The flight is short, but then comes train, cab and so on. I don't know about you guys, but when I go somewhere, when I travel, I always like to be early. I hate to be late and I would hate even more to miss a train, flight or whatever! So I go very very early, which means that I have a lot of time to kill in the airport, train station, ... etc. This time I was lucky, the only store in the airport got some nice things to check on! I have been checking on Melissa shoes for a while but somehow now it's not so worth to buy sandals anymore (when living in Helsinki as the Summer will be over quite soon) and as it's raining in France! But thursday, I found these Friis & Company for 9,95 euros so I jumped on it! So if you take a flight soon in Helsinki, check the airport stores! When it's not for the food, you might find some good deals!


Friis & Company 

Arrived in Paris, I had to wait in the train station on Friday to go back to my hometown, so I had to again 'kill' time shopping. I found this great 'leather looking' jacket at Mango. I was looking for a new leather jacket, but I love this jean jacket look. I bought also in Helsinki the pants from the same fabric and I can't wait to wear it! What do you think?


Mango

Fr: Bonjour bonjour, je suis finalement arrivée en France. Mon vol d'Helsinki a Paris était très court, mais quand on rajoute les taxis, trains et autres transports utilisés, finalement, le trajet s'allonge légèrement! Et je ne sais pas si vous êtes comme moi mais je déteste être en retard, et du coup, je suis toujours beaucoup trop en avance! Jeudi dernier quand je suis allée a l'aéroport de Vantaa, j'étais encore une fois très en avance, et j'avais donc beaucoup de temps a 'tuer' a l'aerport. Heureusement pour moi, j'ai fait une bonne affaire dans un magasin de l'aéroport! (Et vous avez définitivement plus de chance de faire une bonne affaire côté vêtements, parce que côté nourriture... c'est vraiment du vol!). J'ai trouvé ces ballerines Friis & Company pour 9,95 Euros a la place de 39,95. Je regardais depuis un moment pour une paire de Melissa mais je me disais que l'été a Helsinki n'allait plus être très long, donc je me demandais si c'était une bonne idee. En tous cas, si vous passez par l'aéroport de Vantaa, gardez vos yeux ouverts, vous n'êtes pas a l'abri d'une bonne affaire! 


Et une fois arrivée a Paris, j'ai encore eu beaucoup de temps a 'tuer' a la gare avant de rentrer dans mon village natal. J'en ai donc profité pour faire un peu de shopping encore une fois et j'ai trouvé une très jolie veste chez Mango. Je regardais depuis un moment pour une veste en cuir, et celle ci est en jean mais j'ai flashé! J'ai acheté le pantalon dans la même matiere a Helsinki et j'ai tres hate de le porter! Qu'est ce que vous en pensez?

Thursday, August 4, 2011

France/Ranska here I come!

Hi guys, today I am going home. I will fly this afternoon to France and spend some time there to see my family and my friends. I will try to keep up with the DIYs when I am there but I think that I won't be too active until end of this week (time to visit everyone and give big hugs around :)
Concerning the DIYs, I am thinking about trying to make a 'tutu' and one laces short for example. Let's see what I will come up with!
I guess I will also enjoy my time in France to show you little bit more of my region. Usually people come to France to visit Paris and the South (Riviera) but the other parts are bit abandoned. And I come from the North-East part of France: la Lorraine so I will try to show you the good things to do if you come around there. I am really close to Alsace where my parents are from. From there it is so easy to visit Germany, Switzerland, Belgium and Italy for example!
I also can't wait to show my nose in 'patisserie' and 'boulangerie' :) This I miss very very very much!
Anyway, I will talk to you later. Enjoy your Summer! Hope the good weather stays in Helsinki!

Ooh France, I missed you and I am going home!!!

Sacre-Coeur, Paris

Jardins Albert Kahn, Paris


Colmar, Alsace

Kaysersberg, Alsace

Route des Vins, Alsace

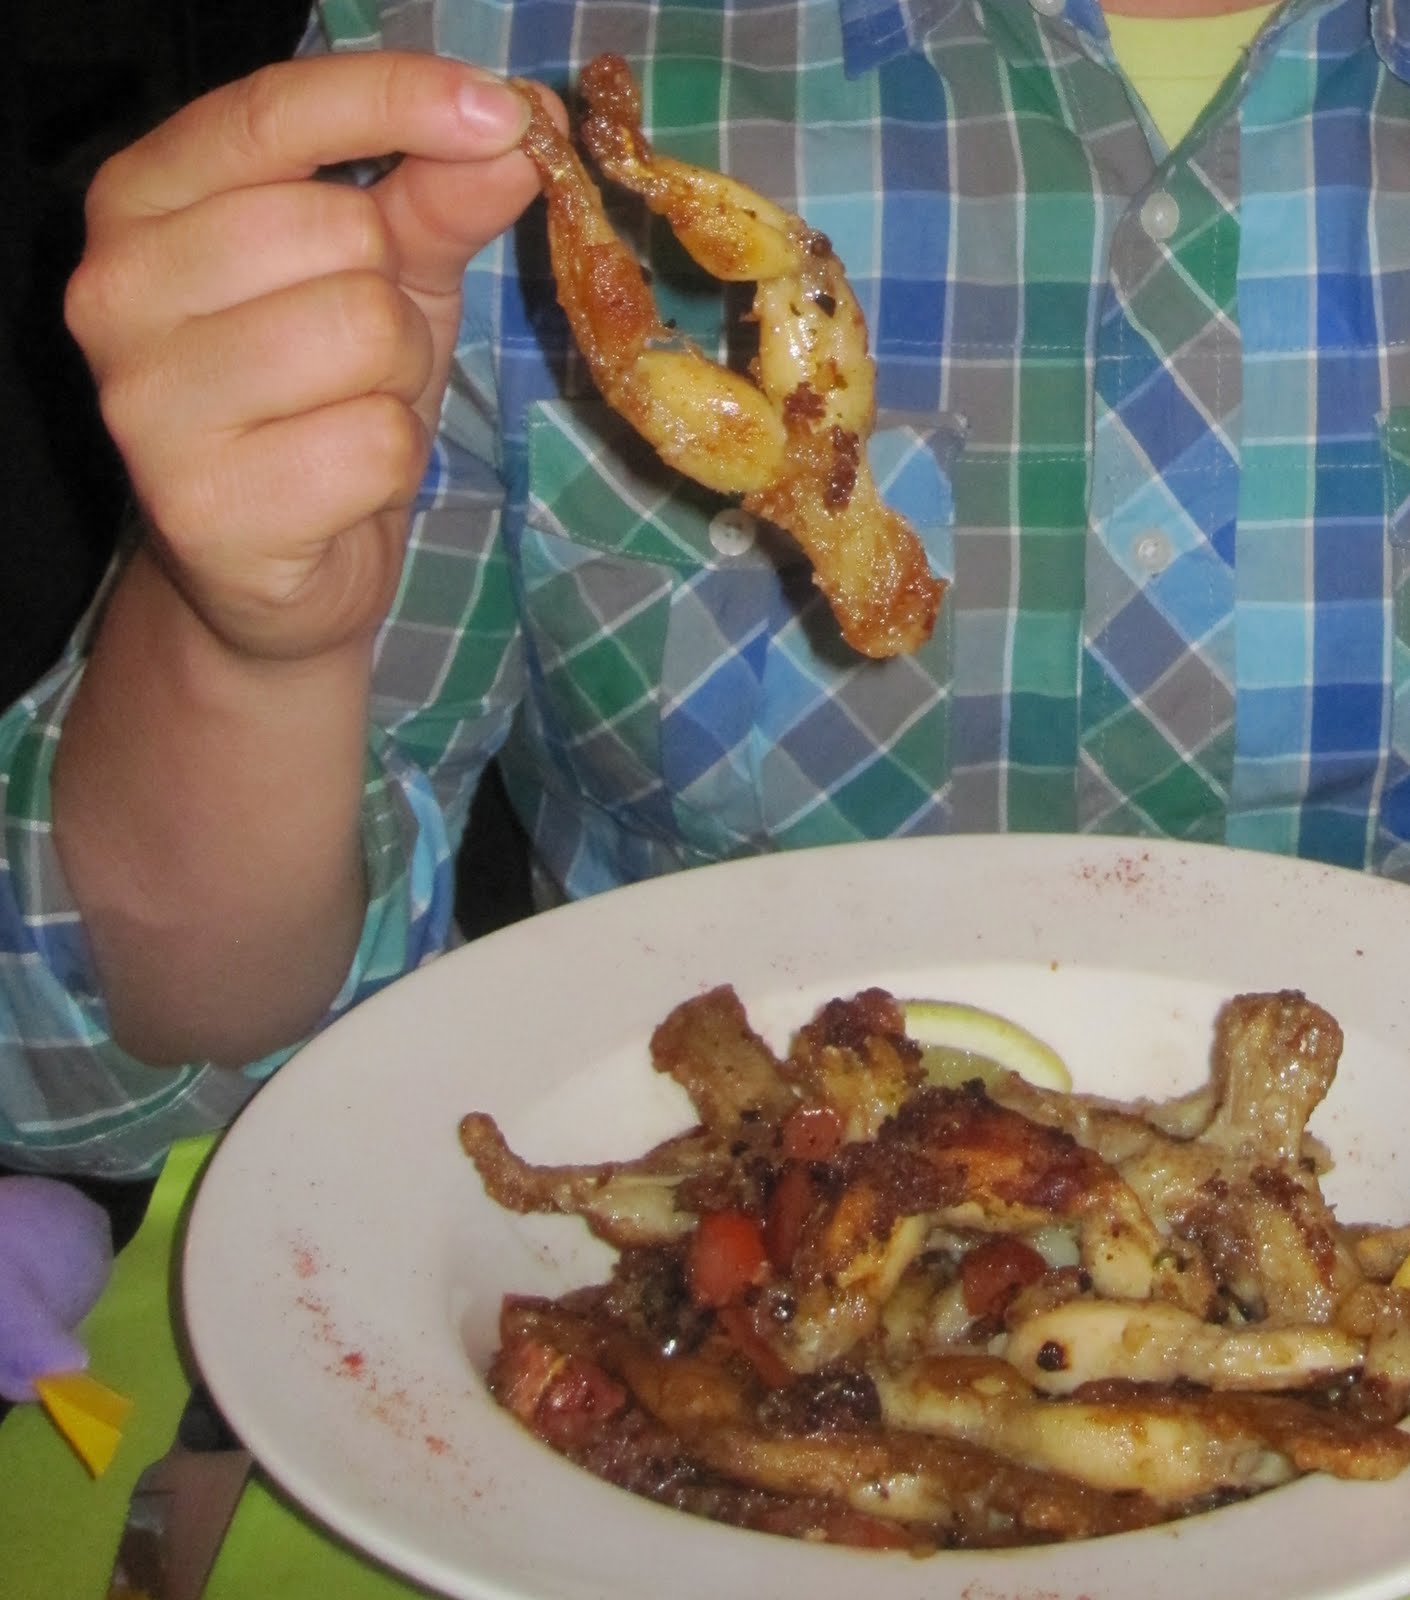
Cuisses de grenouilles (Frogs :)

Tarte flambée (not the original one, little bit re-visited)


Bonjour bonjour. Juste une petite note pour vous dire que je rentre chez moi cette apres-midi. Je prends mon avion très bientôt et je vais rendre visite a ma famille et mes amis en France. En bref, je vais surement être un peu absente des DIYs en cette fin de semaine mais je vous promets de m'y remettre très vite! Je prévois de faire un tutu et aussi un short en dentelle par exemple. On verra bien ce qui ressort de tout ça! Je pense que je vais aussi profiter de mon séjour pour montrer un peu la France en photos a mes amis Finlandais. Il est vrai qu'en général, les touristes se retrouvent a Paris ou dans le Sud, mais les autres régions se font un peu abandonner. Je vais donc essayer de remédier a cela, et donner envie aux Finlandais de venir visiter le Nord-Est de la France (Lorraine, Alsace, etc).
Je vous souhaite a tous un très bon été, et un très bon mois d'aout! Profitez en bien et a bientôt!

Sunday, July 31, 2011

Wedding outfit 2/5

Hi guys, I just came back from Kauhava where we were attending the second wedding of the Summer (3 more coming up ...). We had nice time and enjoyed the spa hotel very much! I knew the weather would be sunny, so once again I went for a 'light' outfit. As my dress was very simple, I decided to add the hat to look little 'fancier'! You have already seen the hat because I have it on my profile picture but I'm absolutely crazy about it. It is a Kirsi Nisonen hat, who is a Finnish designer and I would advise anyone to check on her creations! I also had orange nail polish (everyone has understood that pink/orange are the colors of this Summer), which also allowed me to match my boyfriend's orange tie)
Let me know what you think about it!


Gina Tricot Dress
Kirsi Nisonen Hat
Mango shoes
H&M black ring + bracelets
Swatch ring (gold)
Seppälä blazer
Monki clutch
OPI orange nailpolish

Fr: Hello hello, je reviens seulement d'un mariage qui a eu lieu a Kauhava, prés de Seinajoki (milieu de la Finlande, cote Ouest). C'était le second mariage de l'été, trois de plus a venir!
Pour ce mariage comme pour le premier, je savais qu'il allait faire chaud, voire très chaud (oui il peut faire chaud en Finlande, et beaucoup plus chaud qu'en France en ce moment parait-il) donc j'ai misé sur un ensemble assez léger. Ma robe était très simple donc j'ai décidé de forcer un peu plus sur les accessoires, avec mon chapeau notamment!
Qu'est ce que vous en pensez?  

Friday, July 29, 2011

Mousse au Chocolat

Yesterday was raining in Helsinki, even got some lightening ... And in order to handle my day spent inside (which didn't happen for a long time this Summer) I had the idea to make something that included a lot chocolate! I am the hugest fan of chocolate. I just love it! If I know that there is chocolate in some meal, I get super excited :)
I have been doing mousse au chocolat for a long time but I wanted to 'refresh' my recipe! And I found this "silky, old decadent old-school chocolate mousse" at Smitten Kitchen. The name of the recipe sounded great, and the pictures too, so I got started on my dessert!

For this decadent chocolate mousse, you will need:
- 225gr of chocolate (not more than 60%)
- 115gr of butter (not salted butter) > (Becel is not the best for baking!)
- 3 large eggs (to be separated)
- Tablespoon of Cognac
- Teaspoon of salt
- 125 g of cream (whipped cream 'Vispi Kerma')


Step1. You need to put the chocolate in small pieces to heat in a bain-marie. Warm and stir the chocolate while warming.


Step2. When the chocolate is about to be totally melted, take your butter and melt it in the microwave (10-15secs is very enough). And add the melted butter to the melted chocolate and stir the whole mix.


Step3. Then separate the white from the yolk of the egg. Put the white in one bowl and the yolk in the other one.


Step4. With the electric hand mixer, beat the yolk of the egg and add the tablespoon of Cognac. Add the mix to the melted chocolate.


Step5. Then use the electric hand mixer to beat the white of the eggs until it gets stiffed. While mixing, add a pinch of salt. And when you are done, add the white of the eggs to the chocolate mix. Stir nicely so that you don't 'break' the white of the eggs.


Step6. Pour the whipped cream into a bowl and use the electric hand mixer to beat it. It needs to make small 'pack'. When it is over, add it to the chocolate mixture and stir nicely.


Step7. After the mixture is smooth and fluid, you are done. You need to put your chocolate mousse in the fridge for 1-2h. After that you can taste and enjoy!


What do you think about it? Is it very different from the recipe you have been following before?

Fr: J'ai décidé d'occuper ma journée d'hier a faire un peu de cuisine! Je suis une très grande fan de chocolat et les recettes de desserts m'attirent toujours beaucoup plus que celles des entrées ou plats principaux! Cela fait un moment que je fais des mousses au chocolat, mais j'avais envie de rafraichir ma recette! Et c'est chose faite! Je trouve cette recette bien meilleure que la précédente! Je l'ai trouvé sur le site Smitten Kitchen. Le titre de la recette a tout de suite attiré mon attention: 'soyeuse, décadente et old-school mousse au chocolat' :)


Pour cette recette, vous avez besoin de:
- 225g de chocolat (pas plus de 60%)
- 115g de beurre (non salé)
- 3 gros oeufs (a séparer)
- Une cuillère a soupe de Cognac
- Une pincée de sel
- 125g de crème (de type chantilly)


Etape1. Coupez le chocolat en petits morceaux et faites le chauffer au bain-marie. Remuez pendant que le chocolat fond. 


Etape2. Quand le chocolat est presque totalement fondu, placez le beurre au micro-onde (10-15 secs est suffisant). Ensuite, une fois que le beurre est fondu, ajoutez le au chocolat fondu. Laissez reposer.


Etape3. Séparez ensuite les blancs des jaunes d'oeufs. Mettre les blancs dans un bol et les jaunes dans un autre. 


Etape4. Avec un batteur (mixeur) électrique, battez les jaunes d'oeufs et ajoutez la cuillère a soupe de Cognac. Ajoutez ce melange au chocolat fondu. 


Etape5. Ensuite, montez les blancs d'oeufs en neige. Ajoutez une petite pincée de sel dans les blancs. Lorsque vous avez terminé, ajoutez les blancs d'oeufs en neige au chocolat fondu. Faites attention quand vous remuez le mélange a ne pas casser les blancs. 


Etape6. Verser la crème (pour chantilly) dans un bol et mélanger a l'aide du mixeur électrique. La crème doit faire des petits paquets. Lorsque vous avez terminé, ajoutez la crème battue au chocolat fondu et mélangez.


Etape7. Une fois que votre mélange est fluide, vous avez fini! Il vous suffit de mettre votre mousse au chocolat au réfrigérateur pour 1 a 2 heures. Il ne vous reste plus qu'a déguster! Bon appétit! 

Qu'est ce que vous en pensez? J'ai trouvé que la petite pointe de Cognac faisait tout dans la recette! Et j'ai définitivement trouvé que cette mousse avait un aspect plus 'soyeux' que les autres! Pas vous?!

Wednesday, July 27, 2011

Shoe Makeover: Paint your shoes DIY

Hei guys, I haven't been writing in a long time now. My really good friend had 2 Italians over and I went with them the whole last week to visit Helsinki, party in Helsinki etc :)
So the fact is that I didn't work so hard on any project during that last week! So now that they left, I started right away again on something!
I saw these asymmetric Zara court shoes a long time ago:

Picture: Polyvore.com

And somehow I thought that I will think about it before buying them, and this was stupid because of course, when I came back to get them they were gone!

But I wanted them so bad that I didn't give up! I went back to Zara and try really hard no find them. No better luck of course, but I saw the same with shorter heel in yellow/mustard color. I thought that this color was very very very ugly, but I was pretty sure I could do something about the color, so I bought them. (PS: 25,95 euros on sale = me like it). 


I think those are really classy and I didn't want to get crazy on the colors. I actually wanted them in black, just like the one I wanted to buy at first! But I thought, if you do something yourself, make a littler customization too! And I did. So for painting and customizing your shoe, you will need:
- Acrylic Leather Paint (of your choice, here black mostly, magenta and turquoise + white)
- Acetone
- Cotton
- Gloves (cleaning gloves suit perfectly)
- Paintbrush (big and small one for details)
- Matte Acrylic Finisher
- A lot of old newspaper (so that you don't damage your table)


Step1. Clean your pair of shoes with the Acetone. Take a little cotton and wash the whole shoe. (PS: If you just bought them they are obviously not that dirty but here, the fabric of the shoe is Suede, and cleaning them with Acetone will allow your shoe to become more smooth and by consequence, easier to paint them). You should then let the shoes dry for 10-15min.


PS: These are my boyfriend's hands on the picture. I really did those shoes myself but I borrowed the material (paint and brush from him as he also customizes his sneakers) and he really wanted to explain and show me how everything works so that I don't damage his material ;)

You will notice on the shoe now that the Suede fabric is much more smoother than before (which will makes your life easier when painting!)


Step2. Then you can start painting the shoes with the color of your choice. Here I started to paint in black. I left the edges because I was using a big brush. (The edges will be done with smaller brush in next steps).


(Boyfriend: "You need to paint like this, on long pieces, you don't want to have too much paint on one place. You would rather paint another layer later on ....")

Step3. I painted in black the top of the shoe (toes) and the part that holds the heel but not the heel. For a little while, I wanted to put two different colors on these shoes so I didn't paint the heel, neither the line between the toe part and the holding heel part (as you will notice).


I now painted pretty much the whole shoe but some work still needs to be done with the smaller brush!


Step4. Take the smaller brush and finish the work on the part you painted. 


The shoe starts to become what I wanted here (when I finished to paint the edges with the smaller brush).


Step5. Then came the part where I had to figure out which would be the second color. I couldn't decide between two colors, so I decided to put them both! And I also decided to paint the heel in black so that it wouldn't look too cheap or 'clown' shoe :)


Step6. But before painting the other color on the shoe, you need to paint the part that is left yellow/mustard in white. When you paint something in black, the color is so strong that it always takes over. But for the other color, put one or two layer of white paint before the color (depending on the fabric you paint on).


Step7. And then you can finish the painting part with the color of your choice. Here magenta on the exterior edge of the shoe, and turquoise mixed with a little bit of white on the interior edge.


Step8. Last step, use your big brush and put the matte acrylic finisher on your shoe. It will allow to keep your shoe in better shape. It will also avoid the 'cracks' in the paint. And then you can just let them dry for a little while. There we go, you are done!


Step9. Optional. You might want to continue the customization with pearls, or hotfix strass, studs and spikes! Let your imagination run! But watch out that your shoes don't become too tacky! 


What do you think about them? Do you think the magenta and turquoise work together with the black? Do you think they still look elegant? I try to publish some picture soon of an outfit with these shoes!!!

Fr: Bonjour bonjour, j'ai été un peu absente ces derniers temps et je m'en excuse! J'ai passé la semaine a visiter Helsinki et faire un peu la fête avec des amis Italiens. J'ai un peu délaissé mon blog pour le coup mais maintenant je me reprends et voici un petit DIY de plus! Je voulais ces chaussures (première image) depuis un moment et j'ai mis un peu trop de temps a me décider, ce qui fait que les chaussures n'étaient plus disponibles quand je me suis décidée a aller les acheter! Eh oui évidemment ... Mais je n'ai pas abandonné! Je les ai vues en jaune moutarde (très moche selon moi) et je me suis dit qu'il semblait possible de les rendre noires comme celles que je voulais au départ!
Donc si vous aussi vous voulez changer la couleur de vos chaussures, il vous faut:
- Peinture acrylique pour cuir (couleur de votre choix, ici noir est la couleur la plus utilisée, magenta, turquoise et blanc)
- Acetone
- Coton
- Gants (gants de nettoyage)
- Pinceaux (un gros et un très petit pour les finitions)
- Vernis acrylique (Finition)
- Beaucoup de vieux papier journaux (pour ne pas abimer votre support)

Etape1. Nettoyer votre paire de chaussures avec l'acetone. Prenez un bout de coton et passez le sur toute la chaussure. Si vous venez d'acheter vos chaussures, elles ne seront évidemment pas très sales, mais ici, les chaussures que j'ai acheté sont en matière 'suede' et le fait de passer l'acétone les a rendues plus 'soft' et par conséquent, elles étaient beaucoup plus faciles a peindre! Une fois que vous avez fini, laissez sécher pendant 10-15min.

Etape2. Ensuite, vous pouvez commencer a peindre la chaussure avec la couleur de votre choix. Ici, j'ai commencé avec le noir. J'ai laissé les bords de la chaussure sans peinture. Il est en effet nécessaire de changer de pinceau pour les bords, pour qu'il n'y ait pas de bavures!


Etape3. J'ai peint le bout de la chaussure et la partie qui soutient le talon. Au depart, je voulais peindre mes chaussures en deux couleurs donc j'ai décidé de laisser le talon et la ligne entre le talon et l'autre bout sans peinture. 

Etape4. Prendre le petit pinceau et finir la peinture en noir (les bords).

Etape5. Ensuite j'ai du décider de la deuxième couleur... ce qui n'était pas chose facile! Deux couleurs me plaisaient beaucoup (magenta et turquoise), donc j'ai décidé de les utiliser toutes les deux! Et j'ai aussi décidé de peindre le talon de la chaussure en noir. Le talon en couleur me semblait un peu trop 'cheap'.

Etape6. Mais avant de peindre les couleurs que vous désirez, il vous faut peindre une couche de blanc (voire deux). Le noir est toujours supérieur a toute autre couleur, mais pour le reste, n'oubliez pas la sous couche de blanc!

Etape7. J'ai peint la ligne intérieure de la chaussure en turquoise et la ligne exterieure en magenta.

Etape8. Finalement, pensez a passer un coup de vernis sur la surface de vos chaussures. Cela permettra de les garder en meilleure condition et aussi d'éviter les 'cracks' de la matière.

Qu'est ce que vous en pensez? Et les couleurs? J'essaye de prendre une photo rapidement des chaussures avec un ensemble!